Tutorial Guidelines
- 1. Complete DSmenu solution
- 1.1 Minimum requirements
- 1.2DSMenu cloud solutions
- 1.3.With signage hardware
- 2. How to create my board design
- 2.1Set background
- 2.2 Add text
- 2.3Add image
- 2.4Create menu
- 2.5 Add graphics
- 2.6Extra properties
- 2.7Import from gallery
- 3.Upload image
- 5.Output of the DSmenu
- 7. How to display my boards
- 7.1Offline use
- 7.2Online use
- 7.3With signage player
- 7.4 Online screen
- 8. Create playlist
- 9. Online screen
Complete digital signage solution
Minimum requirements
DSMenu + Signage screen / TV + Memory stick
- Create your menu board design from DSMenu
- Copy the menu board to a memory stick
- Place the memory stick onto screen/TV
- Display the content
Benefits:
- Cost effective: Only screen and a memory stick needed.
- Low maintenance: Any non technical person can design and handle this application without any hassle.
- Huge template gallery and designer support provided by DSMenu.
You may utilize the Services and resulting Creatives to the benefit and distribution of/for a SEUE Entity (SEUE). A SEUE is defined as an entity which exhibits any or all of the following attributes: separate rooftop, separate front door, separate brand, separate logo, separate menu, or separate service that is distinct and separate from other services within the same parent organization. Examples of "Non Single End User Entity" (NSEUE) entities include shopping malls, strip malls, and vacation resorts with separate and distinct services regardless of ownership.
DSMenu cloud solutions
DSMenu + Smart TV with browser + Internet connection
- Create your menu board design from DSMenu
- Copy the URL and paste the URL to the browser
- Display the content
Benefits:
- Instant content update
- You do not need to down load
- Physical presence on business site not mandatory. Can be operated from anywhere.

With signage hardware
DSMenu + Digital screen + Any digital signage hardware
- Create your menu board design from DSMenu
- Manage your content through digital signage CMS application
Benefits:
- Facilities provided by the service provider.
- Guidance provided by DSMenu on hardware applications.
- You can utilise the URL’s provided by DSMenu on any digital signage hardware.
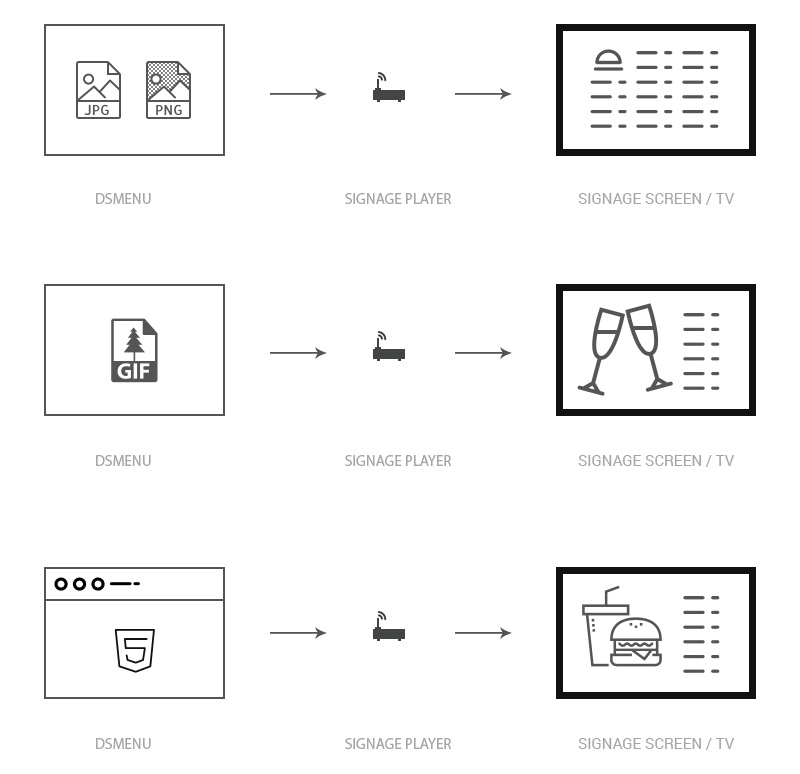
- URL option: Every signage player has an inbuilt application. And every application provides an option to run external URL.
- JPEG, PNG and GIF: Copy the downloaded files to a memory stick, attach that memory stick with the player. Or else, copy the files to inbuilt memory of the player.
Application for Menu Board creation
Now that you are all set to create your menu board let us go through the process step by step
Set background
Background color
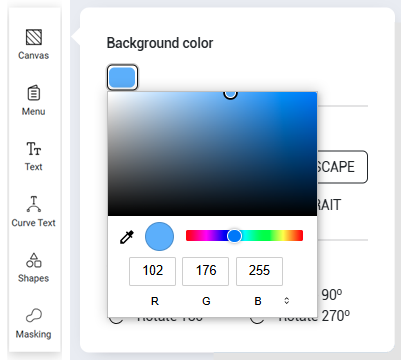
Background color You have complete freedom in choosing any background color through the ‘color picker’ tag. However, you should to keep in mind that the background color is visually most effective when it is in sync with the rest of the board’s contents / graphics. Hence, you also have the freedom to edit, modify or update the background color through trial and error.
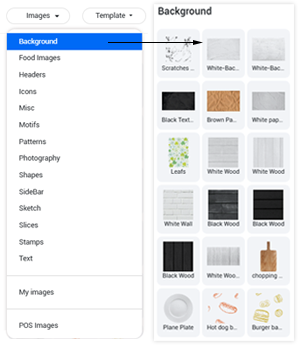
Background image
As we know, the background color is the cardinal aspect of any menu board. With us, you have the option for choosing from thousands of color / color combinations.
For your convenience we provide you three predefined options for creating the background image.
- Chalk texture: You have many chalk themes textures to choose from. When you click on this icon a list of images will appear below the icon. Select, and click on the image.
- Wood texture: Likewise, you have many wood theme textures to choose from.
- Uploaded image: You always have the option to upload any image of your choice.
Click on the set background icon at left panel
- Background color: Click on the color icon. Choose the desired color and click OK.
- Background image: Click on the "Chalk Texture" icon or "Wood Texture" icon, list of respective images will appear below the icon. Then just click on any image.
Add text
An easy option is available to you for adding text.
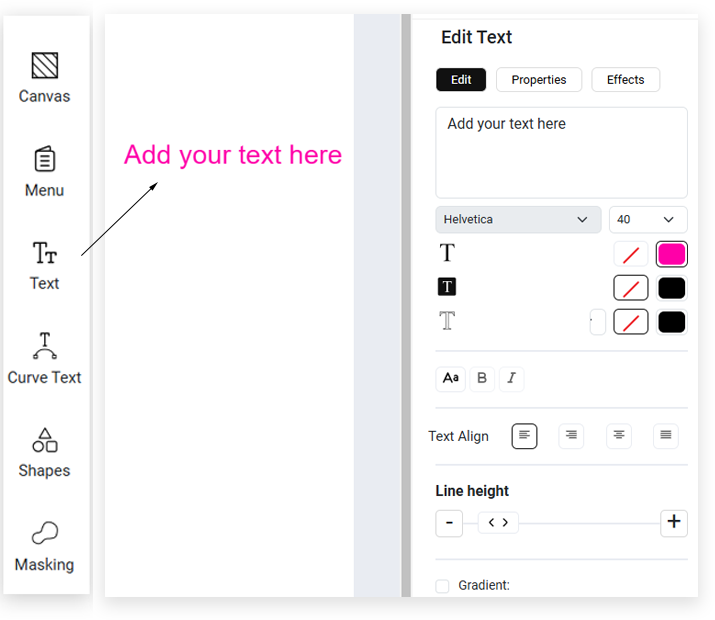
When you click on the “T” icon, one line of the text will be added on the canvass. You may then make the necessary changes.
- We provide a large number of customising options for modifying the text. You may also use the font and alignment options provided by google.
- Further, there are options for adding text strokes, change stroke width and use stroke color.
- Line height can be updated through the available option.
Add image
Predefined image
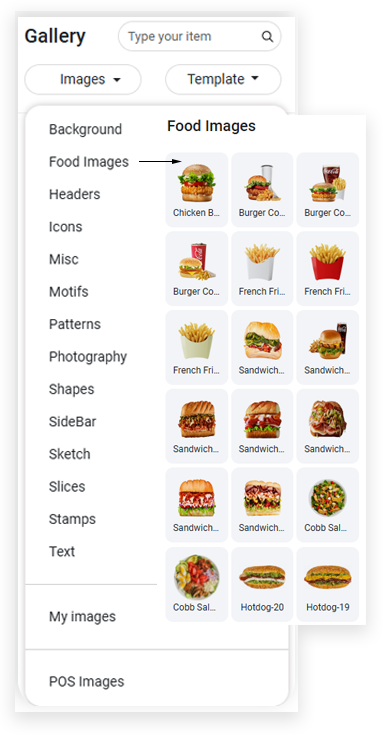
There are huge numbers of pre-existing images, icons, textures, motifs, background, shapes and textures available for use.
Upload own image
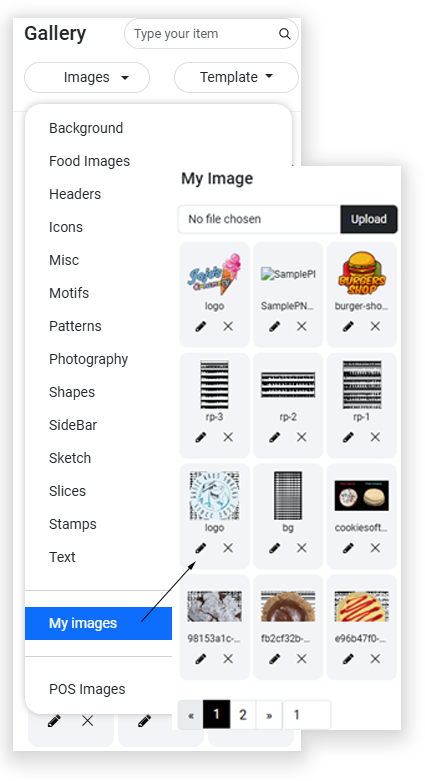
You have the freedom of uploading your own image/s onto the canvass.
Filter and Blending mode
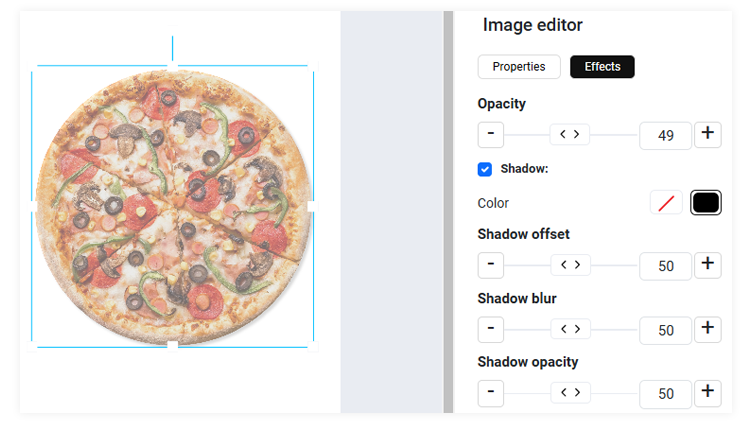
There are few options with Filter and Blending mode. With these options an image can be presented in a more dynamic way.
Click on the image icon at left panel.
- Image from library: Place mouse over the "Library" dropdown. Many options will be displayed from the stock library.
- Image from “My image” : If you want to change one image with another from the library , place mouse over "My images" and select "All images". All images uploaded by you will be listed here and a new image upload option will open. Make the mouse hover on "My images", and the "All images" category will be displayed below it. This will show the category specific image added by you.
Create menu
7 (seven) predifined menu structure is available for your use. You do not need to create and allign each item every time.
- Item name: Item name can be customized with various options. Font family, size, color and extra text options are available.
- Item description: Item description has same options as the Item name.
- Item price: Item price has a different set of options for customization .
- New row: Add new row or delete any old row. It is very easy.
- Menu style: Seven (7) type of menu display options is available.
- Item column: There are four (4) options to choose menu column.
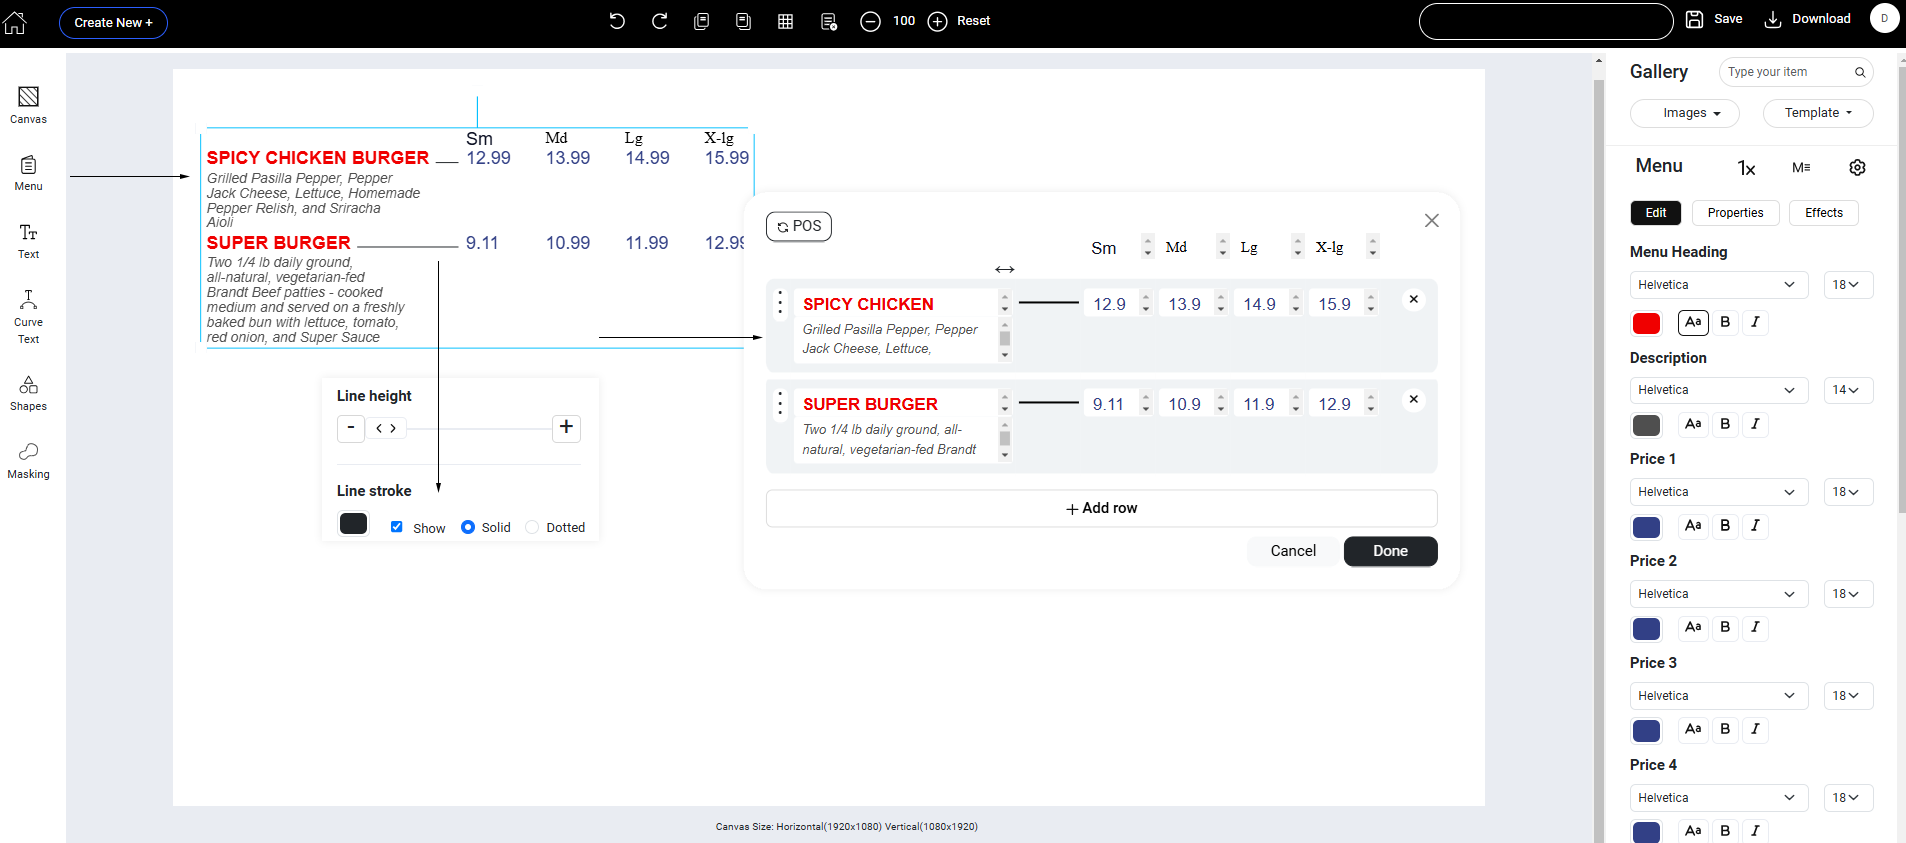
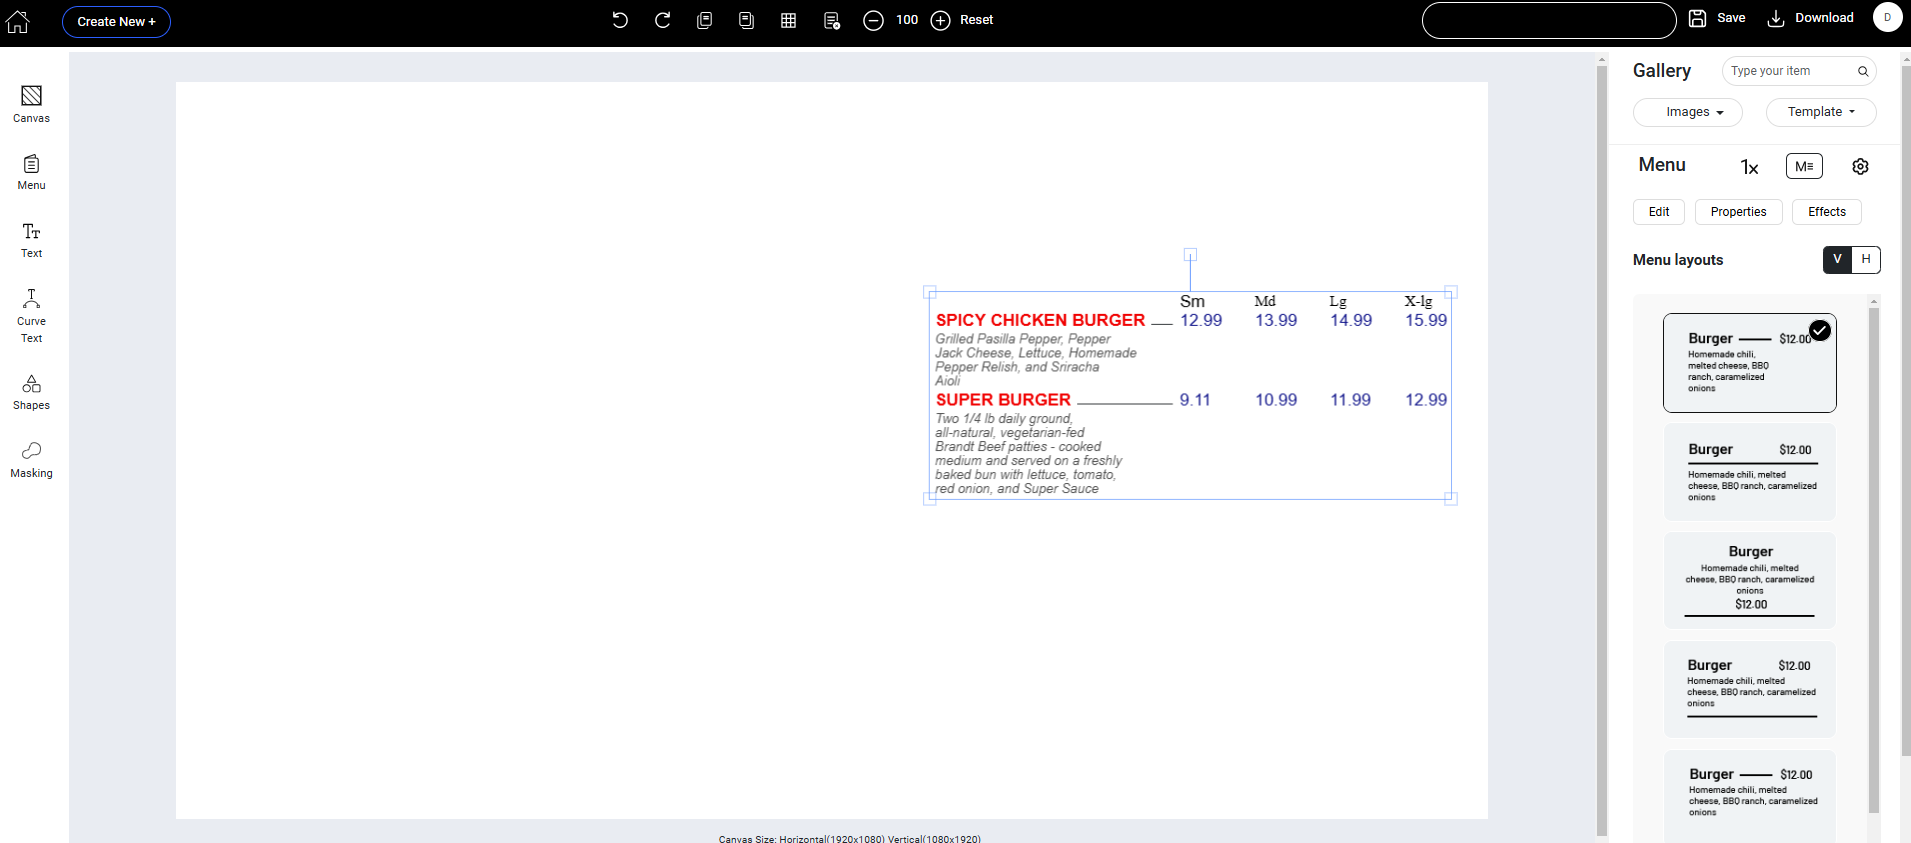
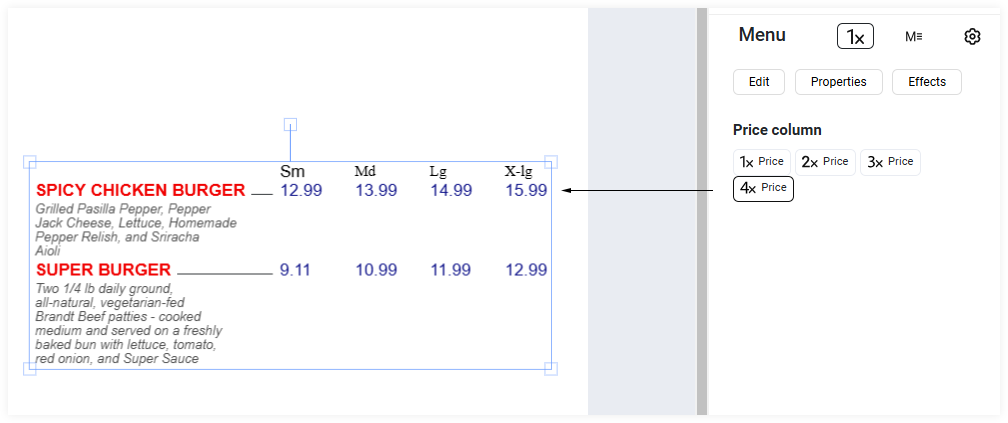
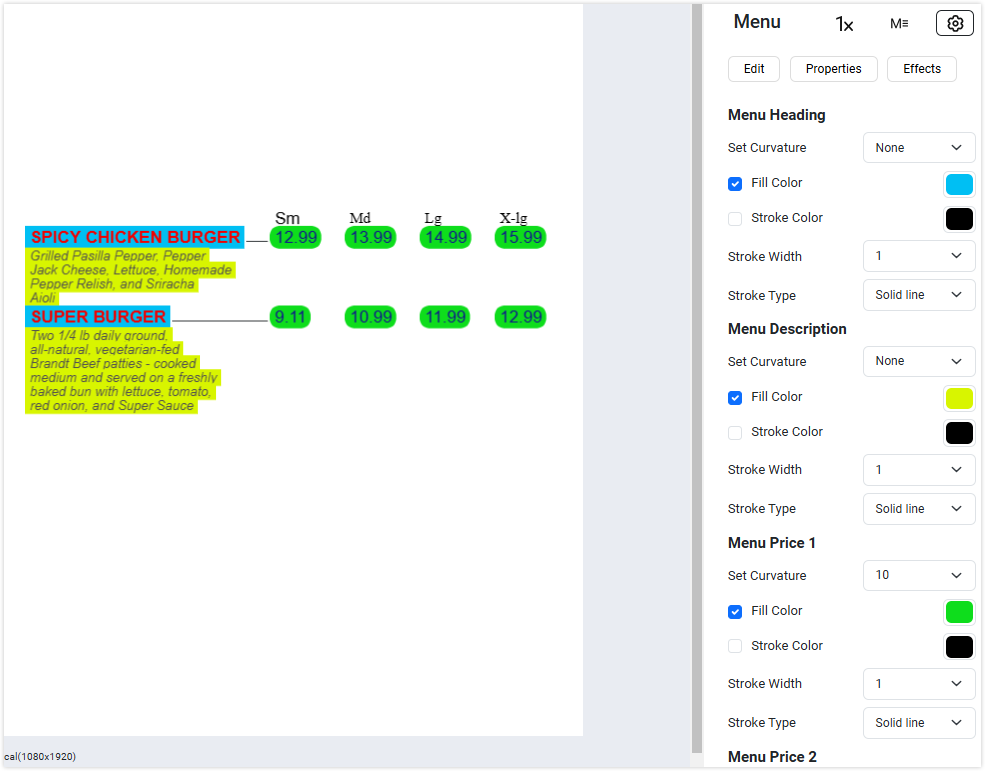
Click on "menu editor" at left panel. A popup will open with various options.
- Item name and description: Add item name, description and price. Change them as often as you require.
- Font and color: Changing font family and color is easy.
- Column display: There are 4 options for column wise display.
Add graphics
Vector shapes
A few predefined shapes are available. Based on recent research, some popular shapes are included into the application. These vector shapes, with options, are certainly customizable.
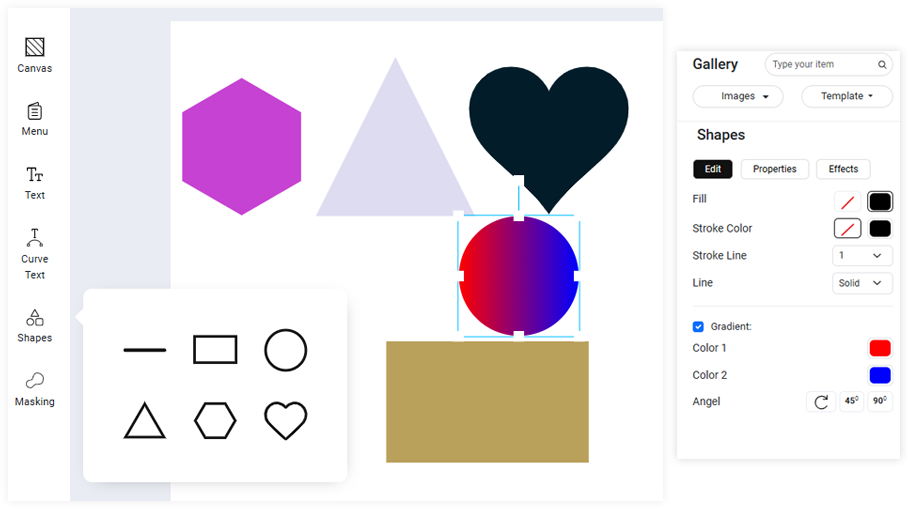
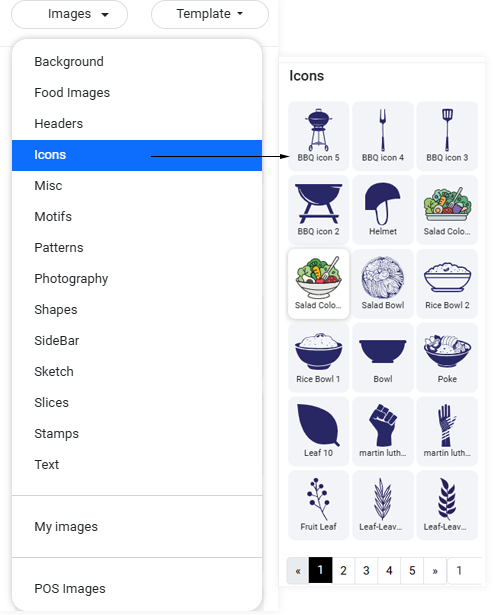
Stock library
Huge stock graphics about Icon, Shape, Pattern and Motif are there under library dropdown.
Extra properties
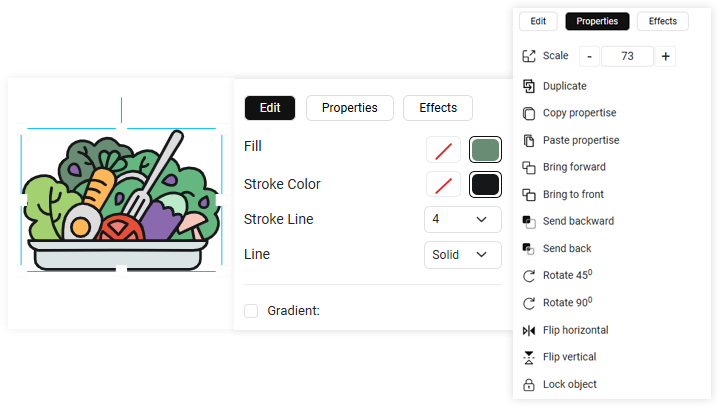
There are plenty of extra properties like Opacity, Scale, Clone, Shadow, Rotate, Layering Options, Lock Object and Remove Object that are available.
Import from gallery
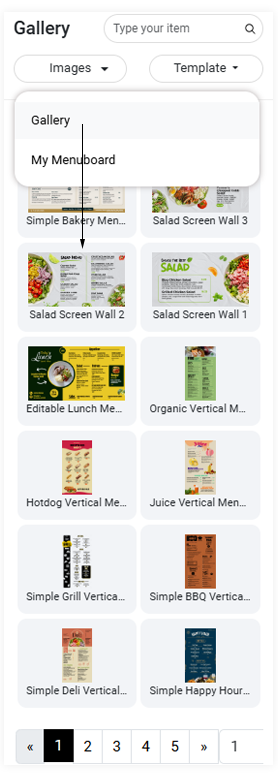
If you by any chance do not have much time to create a new menu board or do not have enough skill to design, you can import a template of your choice and edit the same.
Upload image
Output of the DSmenu
Image
After the menu board is Published , it generates 3 (three) types of images. You can use them as per your requiremnts.
- JPEG: JPG is a file extension for a lossy graphics file. The JPEG file extension is usedinterchangeably with JPG. JPEG stands for Joint Photographic Experts Group. JPEG compression is used in a number of image file formats. JPEG/Exif is the most common image format used by digital cameras and other photographic image capture devices; along with JPEG/JFIF, it is the most common format for storing and transmitting photographic images on the World Wide Web.
- PNG: Portable Network Graphics (PNG) is a raster graphics file format that supports lossless data compression. PNG was created as an improved, non-patented replacement for Graphics Interchange Format (GIF), and is the most widely usedlossless image compression format on the Internet. Why use the PNG format? The default print screen image for Windows is BMP which creates huge bitmaps. GIF would be a satisfactory alternative but PNG is better. Therefore, Solid Capture defaults to the Portable Network Graphics (PNG) format, which is pronounced “Ping."
- GIF: GIF, or Graphic Interchange Format, is a file extension for an often animated raster graphics file and is the second most common image format used on the World Wide Web after JPEG. GIF uses the LZW compression algorithm and is owned by Unisys.
JPEG and PNG image can be downloaded from my board section and can be used for offline purpose and the GIF image can be downloaded from the playlist section and can be use as playlist.
URL
- Image files: Copy the downloaded JPEG, PNG or GIF to your memory stick and place that into your TV or signage player. Select an image and play it. It’s that simple !
- URL: Copy the respective URL and replace the existing one. By the same process content can be placed anywhere.
- In smart TVs: Placing content in smart TV is same as the one based on URL. Open the browser and replace with new link. Simple !
How to display my boards
Output
Image
After the board is published it generates 3 (three) types of image. We can use them as per our requiremnts.
- JPEG
- PNG
- GIF
JPEG and PNG image can be downloaded from my board section and can be used for offline purpose and the GIF image can be downloaded from playlist section and can be used as a playlist.
URL
After the board is saved the site creates a unique URL for that specific board design. The URL contains a responsive HTML content which can be use in multiple screens with different sizes.
Offline use
Only a Smart TV with a browser is required
During the time of running a presentation, if the internet connection goes off; the presentation will still be running. There is an internal mechanisim that is responsible in keeping the signage screen alive even when there is no internet connection.
Through memory stick
You can use your own designed content through a memory stick. Just copy and paste. It is very easy.
Copy the downloaded JPEG, PNG or GIF to your memory stick and place that into your TV or signage player. Select an image and play. Simple !
Online use
URL based
Every design has a unique URL, which contains responsive HTML5 content. Anyone, who wants to play or display their content, needs only an URL. This URL can be displayed through the Facebook post, within a tweet, into a signage display, in a TV through a browser, or via any signage player application. It can also be seen through a mobile phone as well.
Required smart TV with browser
To display the content you have made, you only require a browser enabled smart TV. This in itself will suffice if you wish to display your content to customers.
- How to chanage content through URL: Copy the respective URL and replace the existing. Through same process content can be changed everywhere.
- Change content in a smart TV: Change content in smart TV is same as it is based on URL. Open the browser and replace with new link. Simple !.
With a Media Player
URL option
DSMenu content can easily be published through a signage Player. Customers, who already have signage Player installed can also easily use DSMenu content.
JPEG, PNG and GIF
Copy the downloaded files to a memory stick, attach that memory stick with the player. Or else, copy the files to store in the inbuilt memory of the player.
- URL option: Every signage player has an inbuilt application. And every application provides an option to run external URL.
-
JPEG, PNG and GIF:
Copy the downloaded files to a memory stick, attach that memory stick with the player. Or else, copy the files to inbuilt memory of the player.
Compact screen display
A simplified version of the user level integration is present on DSMenu. Users can assign multiple screens to a unique URL. For example, a restaurant owner has 10 screens and he wishes to assign a single screen for a single purpose ie, a particular screen for breakfast, another for lunch, another one for dinner etc.
Now, there is an option called "My Screen", where-in we can assign a screen for breakfast only. We can assign multiple screens and playlist to a single screen. If we want to update or delete any menu from the breakfast board , we do not need to change the URL for that screen. There is a "drag and drop" option to add or remove any item from the menuboard or playlist from a single screen. This operation can be replicated several times
Create playlist
A subscriber can create his own playlist in DSMenu.
Example:
As a restaurant owner, you would like to display only breakfast menus at breakfast time, lunch menu boards at lunch time and so on.
Solution:
- Breakfast playlist: Need to create a playlist for breakfast. This playlist will be assigned with different breakfast menu boards. Every menu board will have a different transition effect and time.
- Lunch playlist: Need to create a playlist for lunch. This playlist will be assigned with different lunch menu boards. Every menu board will have a different transition effect and time.
- Dinner playlist: The same procedure as like the two boards mentioned above.
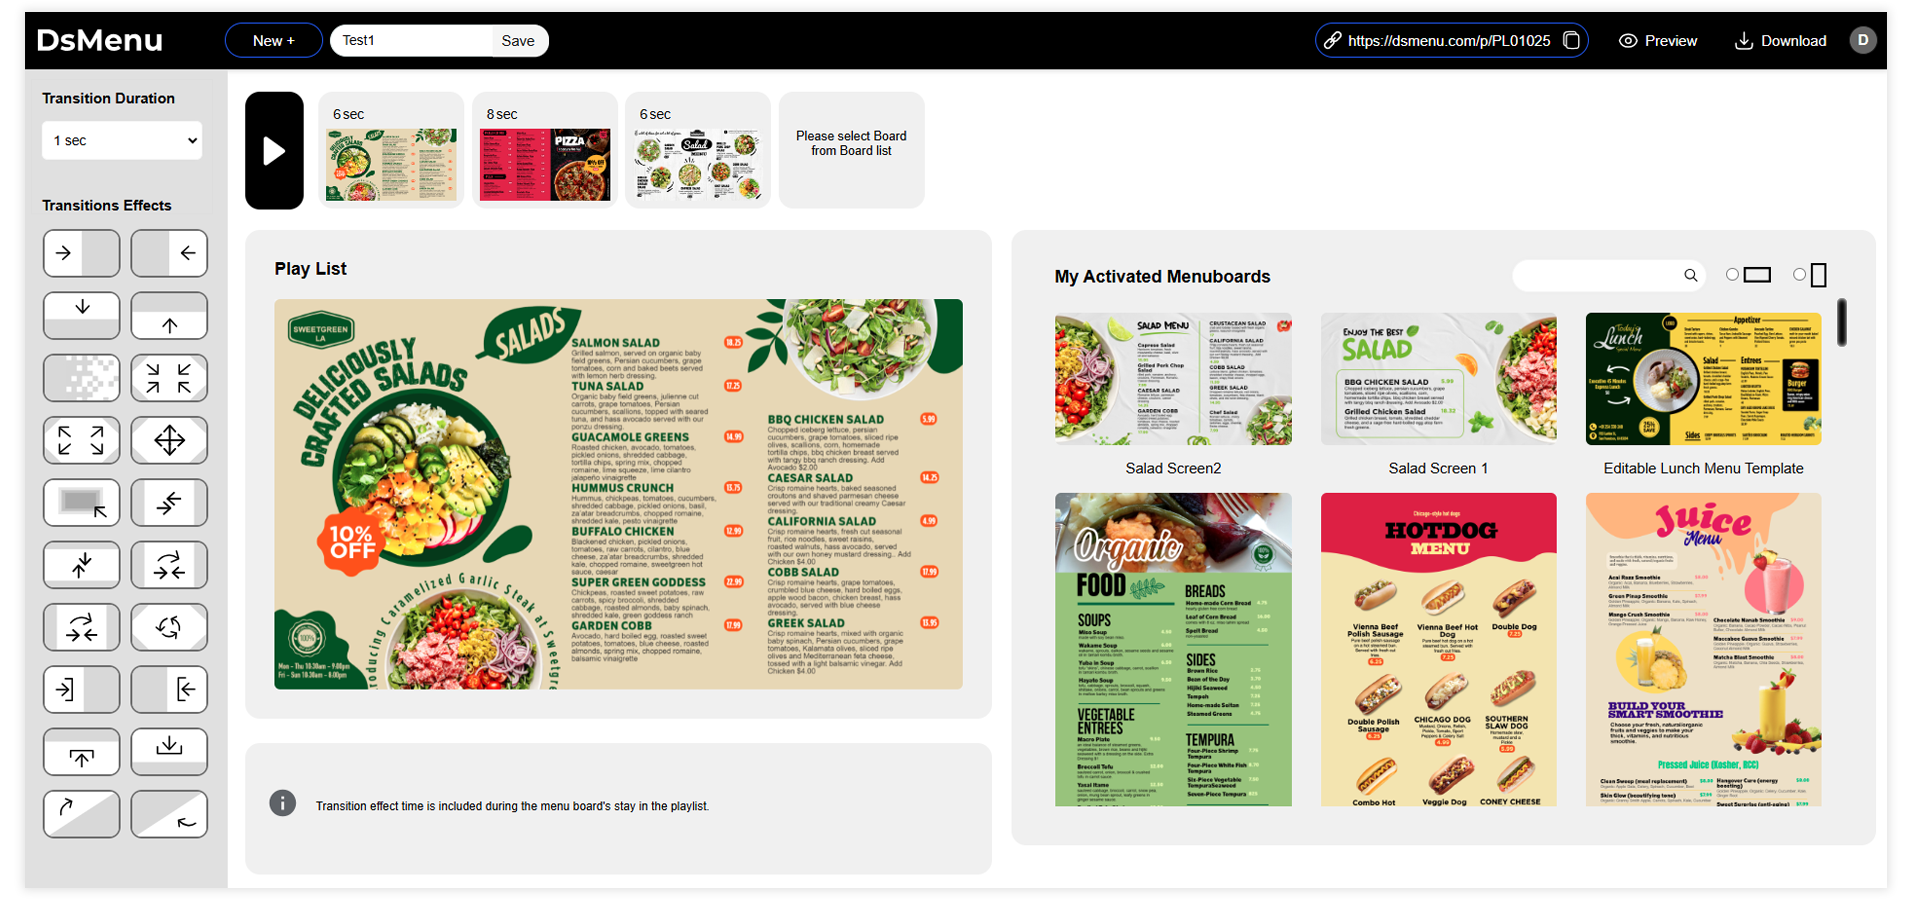
Manage online screens
A simplified version of the user lavel integration is present at DSMenu. Users can assign multiple screens to a unique URL. For example, a restaurant owner may have 10 signage screens, and wishes to assign a single screen for a single purpose ie, a screen for breakfast, another screen for lunch, another one for dinner etc.
Now, there is an option called "My Screen", where we can assign a screen for breakfast only. We can assign multiple screens and playlist to a single screen. If we want to update or delete any menu board dedicated for breakfast, we do not need to change the URL for that screen. There is a "drag and drop" option to add or edit any menuboard or playlist from a single screen. This process can be repeated multiple times.
Example:
A restaurant owner should have a few preferred places to display the digital signage for customers.
- Infront of the restaurant
- Frontdesk
- Waiting room
- Dinning hall
Solution:
For every place, there should be a new virtual screen dedicated. Every screen should be assigned to a specific URL. The tag "Clean UI" will facilitate to click on menuboard and playlist and to add on the screens.
URL: After setting up the virtual screens, copy the URL of an individual screen from the "my screen" page and paste that URL to the respective screen. In case there is a signage player, paste the URLs through the application to that particular screen.
 Forgot your password ?
  Back to login